Nursing

This is a guide for GRC's nursing students.

Using the Plotter to print posters

The Plotter Printer 

Plotter printer at the Holman Library
Plotter printer at Holman Library When you need to print an oversized print, the Plotter is your best option! This tabbed box has more information about how to successfully print from the Plotter. Click on the links to navigate, but also keep in mind that the librarians are always happy to review your printer settings or poster before you print! It can sometimes be a tricky process, and an extra pair of eyes always helps, so don't hesitate to stop at the nearby reference desk for help!

Printing Size Options

(click on image to enlarge)

Common paper sizes chart

The plotter printer prints from a roll of paper that is 36" wide. The most common size for printing posters on the plotter is 34"x 44"  also known as "ANSI E", " Oversized E" or just "E". Click the Page Set-up button to select the correct paper size. 

*Please note that "Arch E" is NOT the same size as "E" or "ANSI E" (34"x44"). Arch E is 36"x48" and not proportional to "E".

Step 1 - Before you print:

Save/export your poster file as a PDF:
  • Open your document
  • Depending on your application, you will either click:
    • File-->Export-->Create Adobe PDF
    • File --> Save as --> Download as PDF
  • Adobe will require that you log in with your Adobe ID in order to access your PDF. If you need to create an Adobe ID, please use the link below.

*you should be able to export your file as a PDF regardless of the application that created it

Troubleshooting tip: Make sure to include margins on all sides of your poster! The plotter printer can not print to the edges of the roll of paper. The plotter may automatically shrink your poster or cut off the sides if your poster content goes beyond the printable area of the paper roll.

Step 2 - Open your PDF:

Adobe Acrobat logo

  • Open Adobe Acrobat on your computer
  • You may be asked to log in with or create an Adobe ID with your GRC email address 
  • Click File-->Open and locate your PDF
  • You may also be able to use Adobe Acrobat* to open your PDF by right-clicking on your PDF file and selecting Open with -->Adobe Acrobat

Note: *Do not double click on your PDF file to open your document. Files will open in a web browser rather in Adobe Acrobat. The print dialog box in Adobe Acrobat is much more reliable and accurate than the print dialog box in your browser.

  • Click the print icon 

(click on image to enlarge)

Print icon in Acrobat

Step 3 - Print setup

  • Select the Plotter from the list of available printers

(click on image to enlarge)

Screenshot of printer selection menu with plotter printer selected

  • Click Page Setup and select the paper size that best matches the size of your document (you may need to go up a size if you don't see an exact match)
Oversize E, ANSI E or just "E" (44"x34") is the most common size used for poster printing

(click on image to enlarge)

Screenshot of page setup dialog box with Oversize E paper selected

  • Check the Print Preview window to see if you need to resize your poster

Step 4 - Resize and print:

Do you need to resize your poster?

  • Close the Page Setup box and click Fit AFTER choosing your paper size
  • You should see the image in the print preview window expand to the proper page size

(Click on image to enlarge)

Screenshot of Fit button in Print Dialog box

Printing
  • If everything looks ok, go ahead and click the Print button
  • Log in to the color print release station to release your print job

Note: **For step-by-step printing instructions and troubleshooting tips click the printable guide in the left column.**

Poster Printing - the Basics

Printing Information

The Holman Library (HL) and Technology Building (TC) computer labs both have plotter printers available to students wishing to print large color posters. 

Cost:
  • printing a poster on the plotter will use 100 printing points (students are allotted 350 print points per quarter)
File size:
  • the maximum file size you can send to the printer is 500MB.
File type:
  • most students will save and print their poster as a PDF (even if the poster was created using PowerPoint, Publisher, etc...). Use Adobe Acrobat* to open your PDF document. Double-clicking on the PDF file will open your file in a web browser and you will not see the same print dialog boxes described below. *You may be asked to create an Adobe ID with your GRC email address when you open Acrobat
Choosing the printer:
  • students will need to select the plotter printer from the list of available printers
Paper size: 
  • the plotter printer prints from a roll of paper that is 36" wide. The most common size for printing posters on the plotter is 34"x 44"  also known as "ANSI E", " Oversized E" or just "E". Click the Page Set-up button to select the correct paper size. 
Resizing:
  •  You can enlarge a smaller design to poster size by clicking the Fit button after choosing the larger size paper. *Please be aware that any low-resolution images on your poster may become blurry or pixilated as you enlarge your poster. 
Releasing the print:
  • use the color print release station to release a print job to the plotter.

Try a Poster Template

Poster Templates

Use the templates below as potential guidelines for your poster.  The posters have ready-made margins and you can rearrange anything within the template margins to personalize your poster.

*Using PowerPoint? Make sure to include space on all sides of your slide! Also, make sure your slide is sized to match the proportions of a standard poster print (see Printing Size Options to the left).
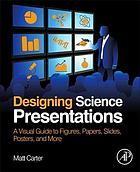
Designing Posters


Using LinkedIn Learning 

Access thousands of video tutorials on creating multimedia projects and using multimedia software with LinkedIn Learning. Topics includes:

  • Graphic Design
  • Photo Editing
  • PowerPoint
  • Illustrator
  • Photoshop
  • Publisher